
If you have spent years in AutoCAD, opening Revit for the first time feels like sitting in someone else’s car. The seat is in roughly the right place, but everything else has moved. This is a tour of the interface so you know what each part does before you draw anything. None of it is hard. It is just unfamiliar, and a few Revit habits are the opposite of the AutoCAD ones you built over the years. Those are the parts that trip up site engineers, so I have flagged them as we go.
The interface layout
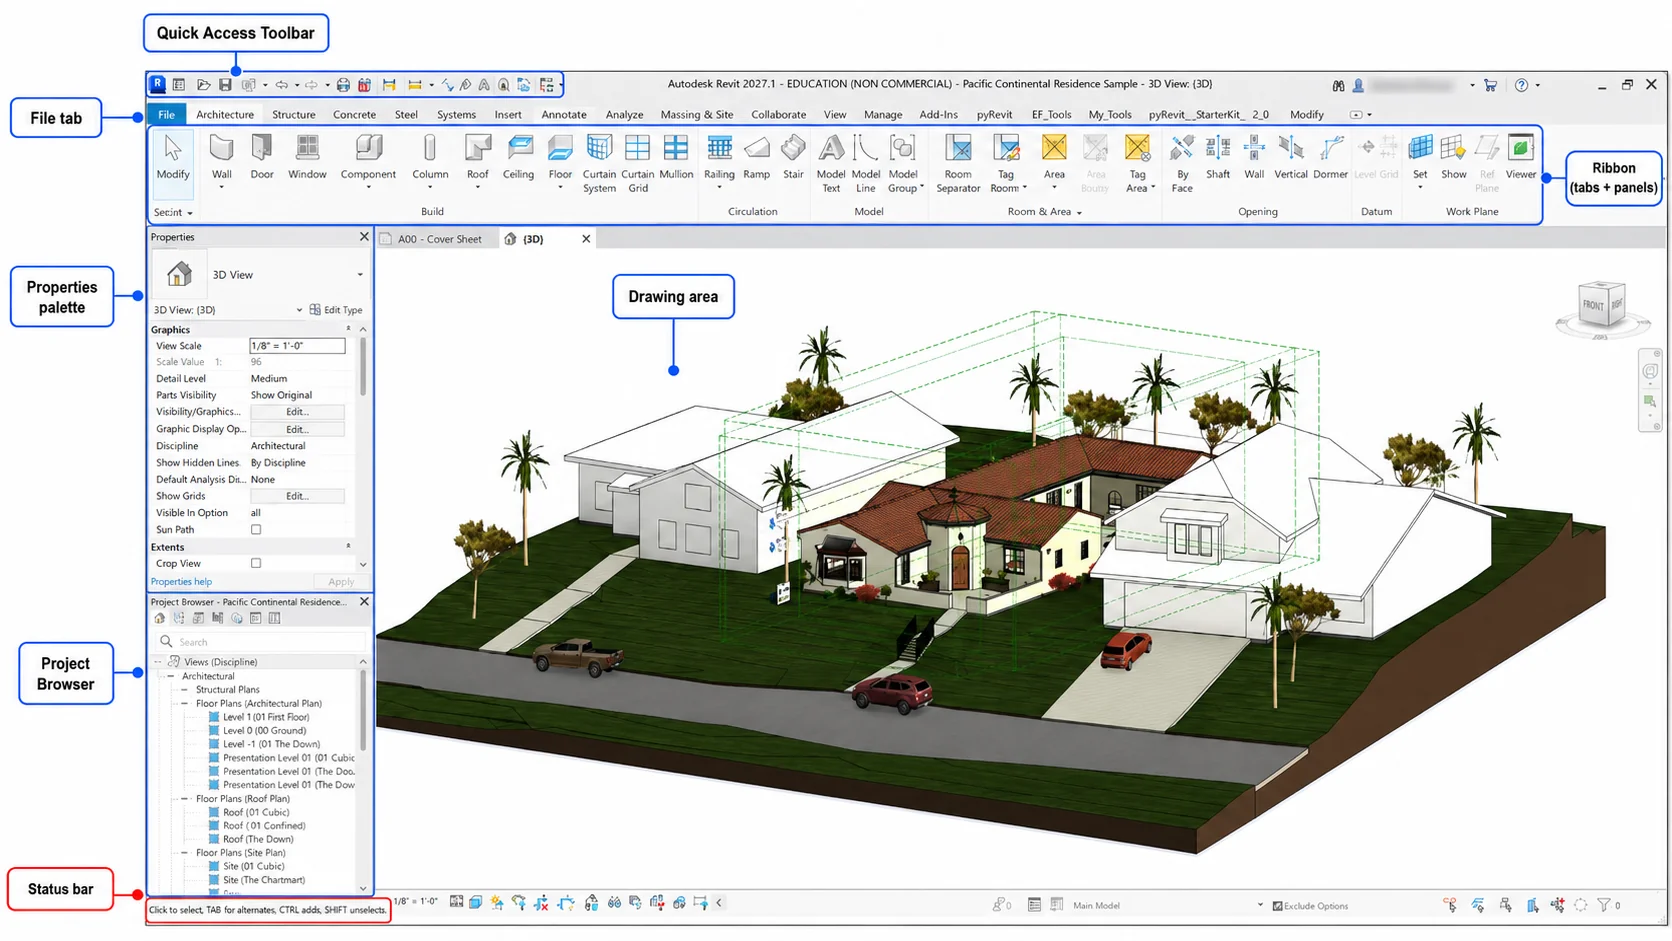
Open Revit and you land on the Home screen, reached through the File tab in the top-left corner. This is where you open a recent project or start a new one. (If an older tutorial calls this the “Application menu”, ignore it. That name went away in Revit 2019.) Once a project is open, here are the parts you will use every day.
The ribbon runs across the top. It is split into tabs (Architecture, Structure, Insert, and so on), and each tab holds panels of related tools. You click a tab to switch the toolset, then click a tool inside it. This replaces the command line you typed into in AutoCAD.
The Properties palette sits on the left. It shows the properties of whatever you have selected, or of the current view when nothing is selected. This is where you change a wall’s height, a level’s name, a view’s scale. Get used to glancing here constantly.
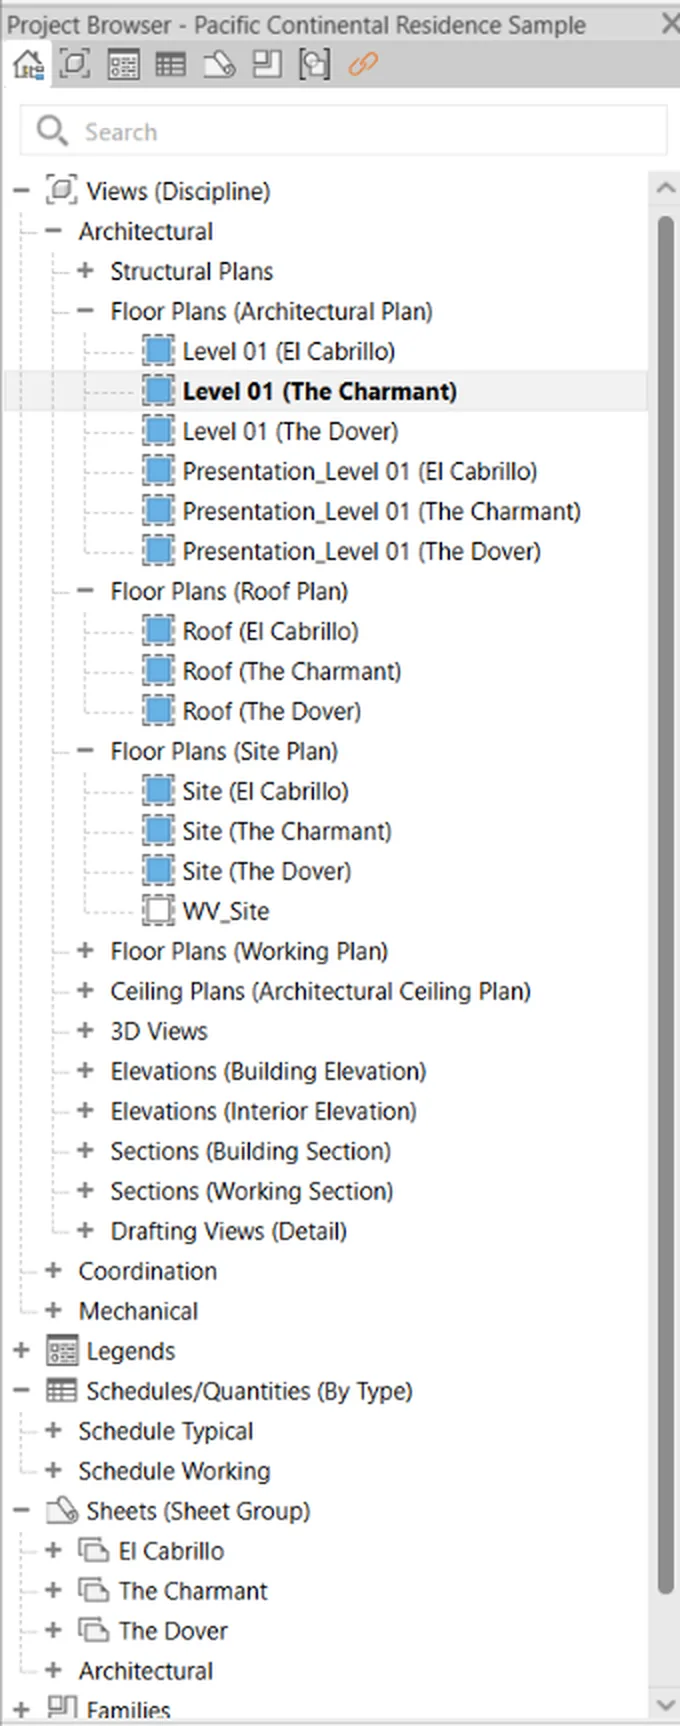
The Project Browser is usually below or beside Properties. It is the table of contents for your whole project: every floor plan, elevation, section, 3D view, schedule, and sheet, listed in a tree. You move around the project from here.
The drawing area in the middle is where the model shows up. The Quick Access Toolbar is the small strip of icons at the very top for things you reach for often, like Save and the default 3D view.
One strip beginners almost always miss: the status bar along the bottom-left. It tells you what Revit is waiting for you to click next. When you feel lost in the middle of a command, read it. It is the cheapest help in the program.
A note if you have used older Revit. Versions up to 2026 had an Options bar, a thin strip just below the ribbon that held tool settings such as a wall’s height while you were placing it. Revit 2027 removed it. Those settings now live in the ribbon and the Properties palette instead, so there is one less strip to hunt around for. If a tutorial or a colleague tells you to “set it on the Options bar,” that is where it went.
Moving around: navigation basics
The mouse does most of the work, and it works the same in 2D and 3D.
- Scroll wheel: zoom in and out. Revit zooms toward your cursor, so point at what you want before you scroll.
- Hold the middle mouse button: pan the view.
- Shift plus middle mouse button: orbit. This only does something in a 3D view.
One orbit detail saves a lot of frustration. By default Revit orbits around the center of the screen, which sends your model swinging off out of sight. If you select an element first, Revit orbits around that element instead and it stays put. Select, then orbit.
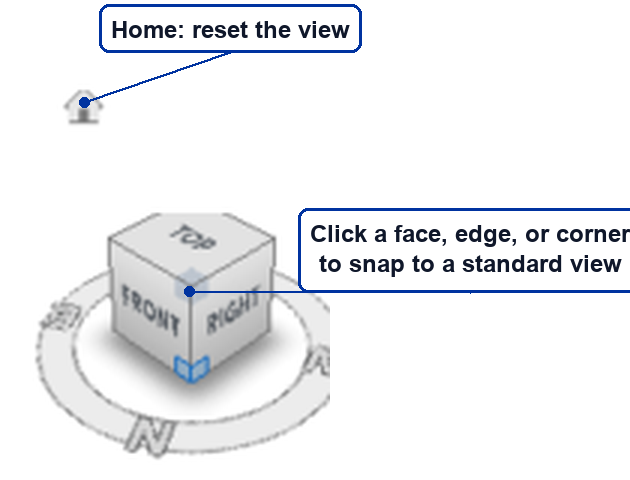
The ViewCube in the top-right corner of a 3D view is the other navigation tool. Click a face, edge, or corner to snap to a standard view. Drag it to rotate freely. Click the Home icon next to it to reset when you have tumbled the view into nonsense.
Zoom shortcuts (and the AutoCAD habit to drop)
A few keyboard shortcuts are worth knowing from day one:
ZEzooms to fit the current view.ZAzooms all open views to fit.ZRlets you draw a box to zoom into a region.
Here is the AutoCAD habit that will fight you: do not press Enter after a Revit shortcut. In AutoCAD, Enter confirms a command. In Revit, the shortcut fires the moment you type the letters, and pressing Enter afterward often cancels what you just started. Type the two letters and stop.
Switching and managing views
You open views from the Project Browser by double-clicking them. A floor plan, an elevation, a 3D view, a schedule: each is a separate view you open this way, and each remembers its own settings.
Every view you open stays open in the background. You can show them as tabs across the top or tiled side by side. WT tiles the open views (Window Tile); TW puts them back to tabs (Tab Windows). Useful when you want a plan and a 3D view on screen at once.
Those open views are also a performance trap. Revit keeps every open view loaded, so a dozen of them will slow the program down. The Close Inactive Views button on the Quick Access Toolbar shuts everything except the one you are looking at. Press it whenever Revit starts to drag.
The View Control Bar: when something disappears
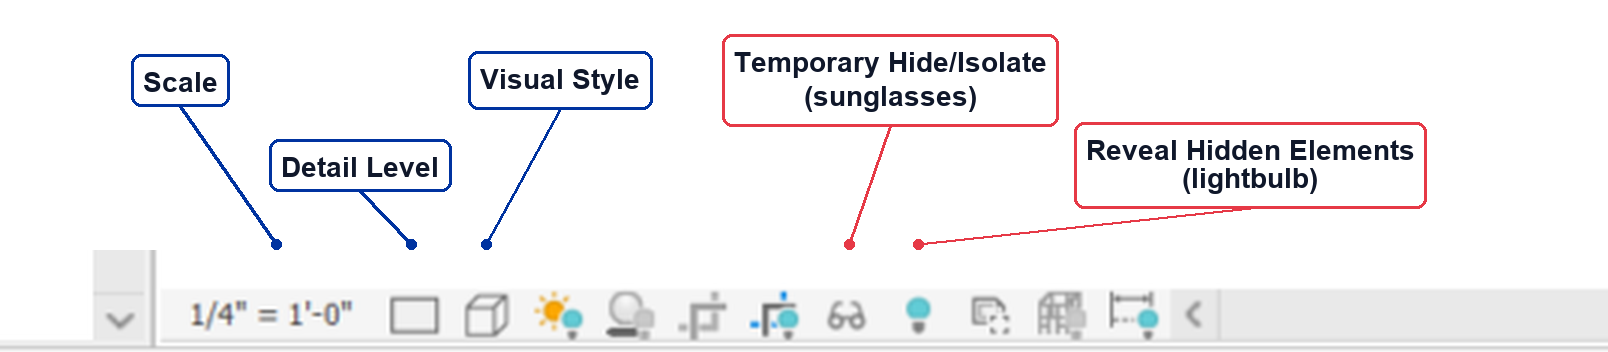
The View Control Bar is the small strip at the bottom of the drawing area, and it controls how the current view looks.
The settings you will touch most:
- Scale sets the view’s drawing scale.
- Detail level switches between Coarse, Medium, and Fine. The same model shows more or less detail depending on this.
- Visual style switches between Wireframe, Hidden Line, Shaded, and others.
Two more tools here are the answer to the most common beginner panic, which is “something just vanished and I do not know why.”
- Temporary Hide/Isolate, the sunglasses icon, hides or isolates selected elements so you can work without clutter. It does not delete anything. It is temporary, which is exactly why people forget they turned it on.
- Reveal Hidden Elements, the lightbulb icon, shows everything that has been hidden, outlined in magenta, so you can bring it back. When a wall or a whole level seems to have disappeared, this is the rescue button. Click the lightbulb, find the element, unhide it, click the lightbulb again.
That is the whole interface. Spend ten minutes opening views, orbiting around a model, and toggling these tools, and the unfamiliarity wears off fast. Once you can move around without thinking, you are ready to start your first project.
If you are still deciding whether the move into BIM is worth it, the civil engineer to BIM roadmap lays out the whole path, downsides included.